Best Build a Bridge Designs
Straight + diagonal, lattice/truss, and arch patterns that survive real physics.
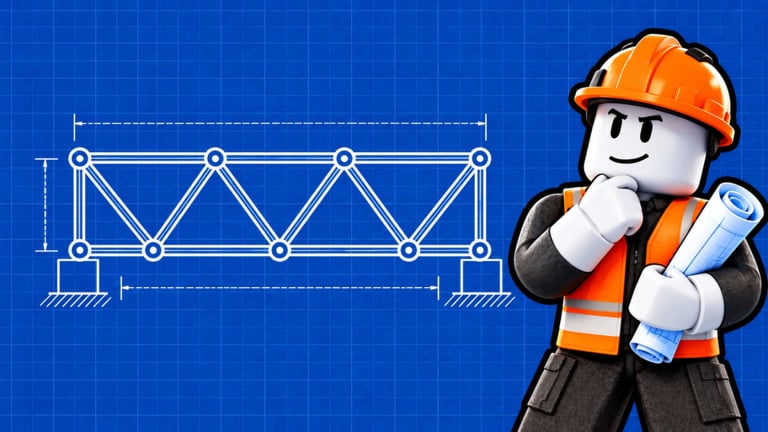
Materials matter, but geometry decides whether a Cement Mixer kisses the water. This guide focuses on three practical families that keep showing up in successful Build a Bridge runs: straight road with diagonals, lattice / truss, and arch-inspired layouts. Pair every idea with Done-testing and the materials tier list.
The mid-article video from ItzVexo highlights design tips you can mirror in-game — watch it after you understand the vocabulary below.
Design principles before templates
- Load path — Weight should travel from the deck into supports that eventually reach solid ground or a braced network, not into a floating stick.
- Triangulation — Triangles resist racking better than stacks of parallel verticals.
- Redundancy — One celebrity beam will fail; neighbors should share stress.
- Observe bend — Soft bend that recovers can be acceptable; accelerating sag means reinforce now.
- Iterate locally — Replace the failed region instead of deleting a working approach every time.
If you are still learning HUD placement, skim Controls so blueprint tracing and the Done button feel natural.
Pattern A — Straight road + diagonal under-braces
Best for: day-one Wood through early Steel (Getting Started).
How to build:
- Draw a mostly straight deck between ledges.
- Drop verticals near each bank for anchorage.
- Add diagonals that lean toward mid-span under the road, like a simplified Warren hint.
- Cross a few diagonals so they meet instead of floating alone.
- Test with light vehicles; thicken only where sag appears.
Why it works: diagonals shorten buckling length and push force sideways into the abutments. Why it fails: players place five vertical posts and one lonely diagonal, then blame Wood.
Upgrade path: swap the deepest-bending diagonals to Steel before touching Titanium.
Pattern B — Lattice / truss webs
Best for: City Bus → Cement Mixer territory and most money farms.
How to build:
- Keep a straight or gently cambered deck.
- Build a shallow truss beneath (or a low through-truss if height allows) with repeating X or V units.
- Connect top and bottom chords so the lattice is a single structure, not scattered props.
- Reinforce the center two bays — that is where mixer weight announces itself.
- Hybridize: Steel lattice with Titanium center if snaps continue.
Lattice shines because every member has neighbors. It is also what many Builder blueprints approximate; tracing one is a legal way to see good spacing when you are stuck (Tools Hub).
Common mistake: copying a lattice screenshot but leaving gaps at the joints. Open joints become hinges under tanker loads from the vehicle tiers.
Pattern C — Arch and arch-assisted spans
Best for: late Steel / Titanium runs and post-rebirth wider gaps.
How to build:
- Establish strong abutments on both banks.
- Curve a compression arch under (or integrated with) the deck, or use a tied-arch vibe with a straight road and curved lower chord.
- Add hangers or verticals from arch to deck so the roadway does not sag independently.
- Triangulate near the springing points — arches love to kick outward.
- Test mid vehicles before inviting Oil Tanker / Heavy Hauler.
Arches convert load into compression along the curve, which Titanium loves. They punish weak banks: if abutments slide, the whole poem collapses. Practice on a mid gap before the first rebirth widens the canyon.
Testing protocol (do not skip)
- Build the pattern in your current material tier.
- Hit Done.
- Watch which bay bends first.
- Add a diagonal or material upgrade only there.
- Retest the same vehicle three times.
- Only then unlock the next heavier unit.
Recording mental notes beats spam-rebuilding. Mid-span collapse failures almost always start as ignored bend that players tried to ignore for one more unlock.
Matching designs to progression
| Stage | Prefer | Material |
|---|---|---|
| Tutorial / Scooter | Straight + diagonals | Wood |
| Box Truck / Bus | Diagonals → mini lattice | Wood → Steel |
| Garbage / Mixer | Full lattice | Steel |
| Tanker / Hauler | Lattice or arch | Steel + Titanium |
| Post-rebirth | Re-validate lattice/arch | Often more Titanium |
Blueprints vs originality
Blueprints from the Builder are training wheels, not cheating. Trace them, then tweak bay spacing for your unlocked vehicle. Original fancy sculptures are great for clips; farms prefer boring trusses that never splash.
Related pages
- Guides Hub
- Earn Money — fund the next material jump
- Materials
- Vehicles
- Updates — retunes can change which pattern feels safest
Build ugly, build braced, build testable. Style points come after the Heavy Hauler finishes the route dry.
Frequently Asked Questions
Quick answers to the most common questions.
What is the best beginner bridge design?
A straight road with diagonal under-braces. Learn that before lattice or arch experiments so you understand why triangles matter.
Why does my lattice still snap?
Joints may be disconnected, the center bays under-braced, or the material tier too low for the vehicle. Fix connectivity first, then upgrade Steel/Titanium on the failure bay.
When should I try an arch?
After you can clear mid heavies on a lattice and you are preparing for tankers or a wider post-rebirth gap with stronger materials.
Do blueprints replace learning design?
No — they teach spacing. Trace, test, then modify so you can rebuild without the blueprint after the next rebirth.